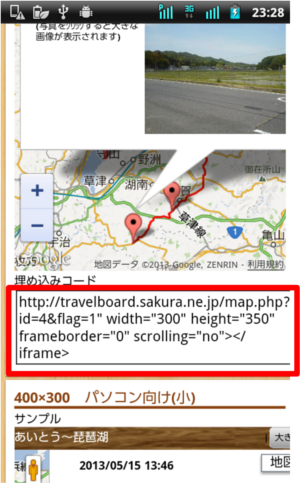
1.Basic operations of map
-
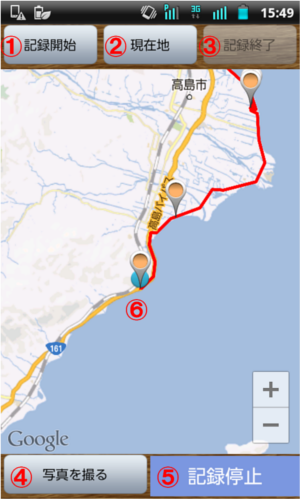
Move Map
Move your finger while touching the map.
-
Zoom in Map
There are three ways。
- Touch "+" button on the map
- Double-touch the map
- Pinch out on the map
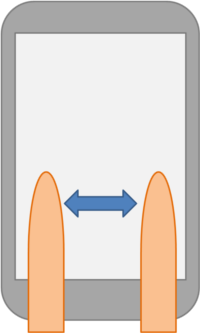
-
Zoom out Map
There are two ways。
- Touch "-" button on the map
- Pinch in on the map
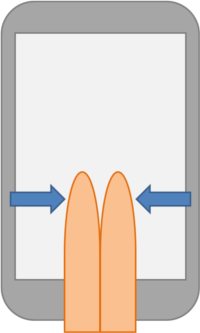
-
Rotate Map
Move to rotate two fingers while touching on the map.
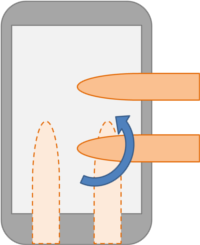
-
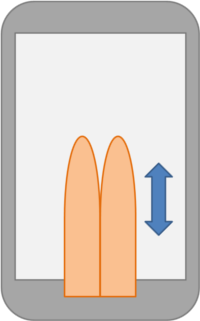
3D Map・Change Map angle
Move back and forth two fingers while touching the map.
-
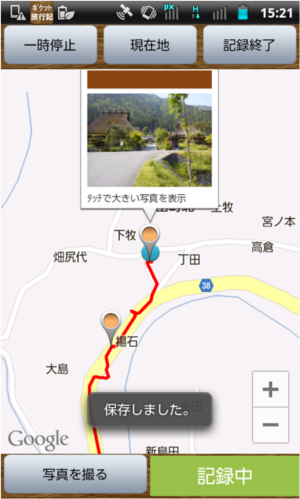
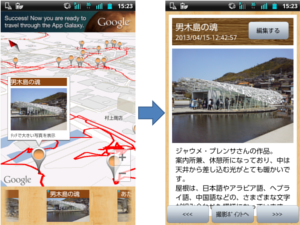
Show Photo Screen
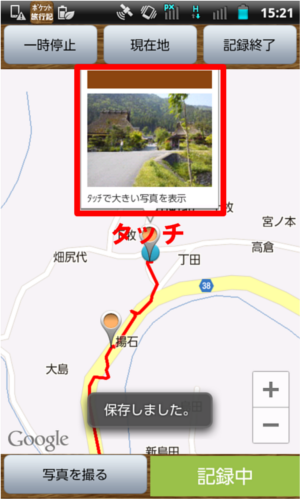
Touch pin. And touch the baloon.
-
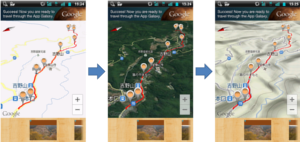
Switch Map/Satellite
Touch long on the map
-
Track ON/OFF(Only Recording)
Switch the ON / OFF of moving the center of the map to your current location, if you touch the map.
Back to the Table of contents
2.Description of the top screen
-
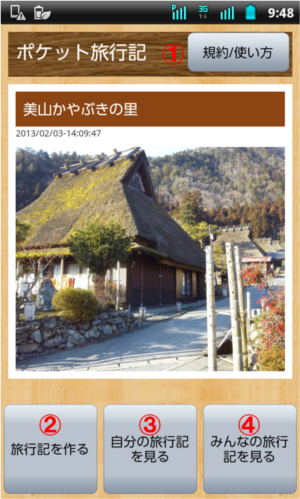
"Notice/Manual (規約/使い方)" Button
Show Manual and Notice.
-
"New Travel Log (旅行記を作る)" Button
Create new Travel Log.
-
"My Travel Log (自分の旅行記を見る)" Button
Show your Travel Log.
-
"Travel Log of others (みんなの旅行記を見る)" Button
Show Travel Log of others.
※If you have not create Travel Log yet, The App Icon will be shown in center.
Back to the Table of contents
4.Show My Travel Log
Show my Travel Log list from "My Travel Log" button in Top Screen.
-
My Travel Log List Screen
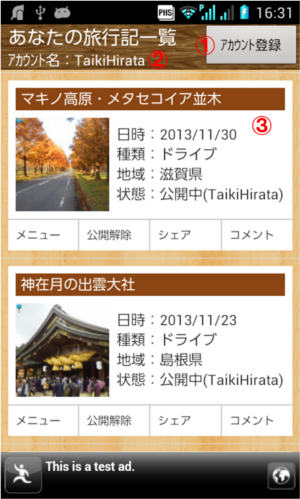
1."Account (アカウント登録)" Button
If you want to post your Travel Log, you need to get account from this button. If you are not going to post your Travel Log, you do not need to get account.
*Refer to "6.Post your Travel Log" for more information.
2."Account(アカウント名)"
Your account name. *If you get and set account.
3.Travel Log List
- Your Travel Log List.
- If you want to show Travel Log, touch the Log.
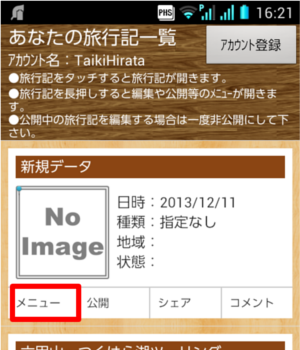
- "Menu (メニュー)" Button:Show the menu of the following content.
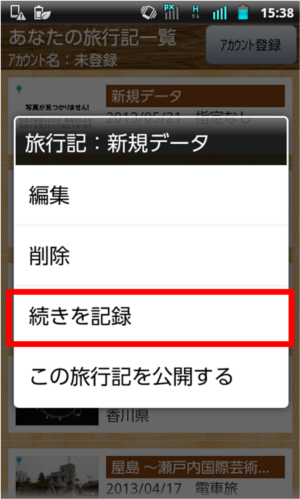
- ●In case Normal:"Edit", "Delete", "Resume", "Add Photo", "Post Travel Log"
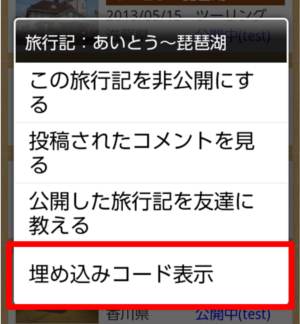
- ●In case Posted:"de-Post Travel Log", "Comments", "Share through the SNS", "Embeded code display", "KML file output"
- "Post/de-Post (公開/公開解除)" Button:Post Travel Log, de-Post Travel Log
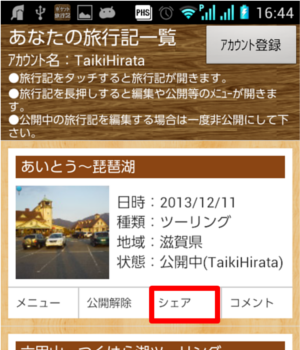
- "Share (シェア)" Buttton:Share through the SNS
- "Comment (コメント)" Button:Post comment
-
Map Screen
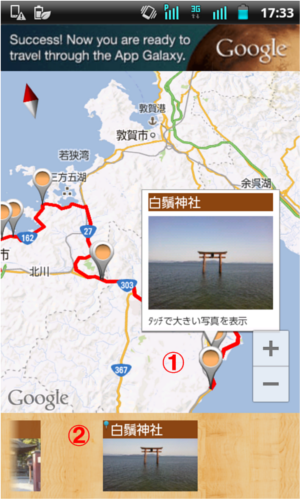
1.Pin
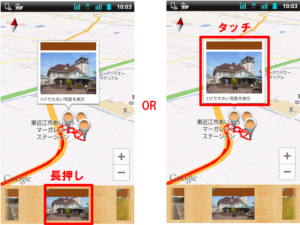
- Pin is photo location. If you touch the pin, balloon containing photo thumbnail and photo title will be shown.
- If you touch the balloon, Photo Screen will be shown.
2.Gallery
- If you touch photo of gallery, the map center will move to the photo location.
-
Photo Scree
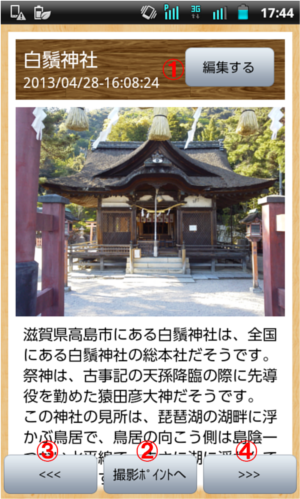
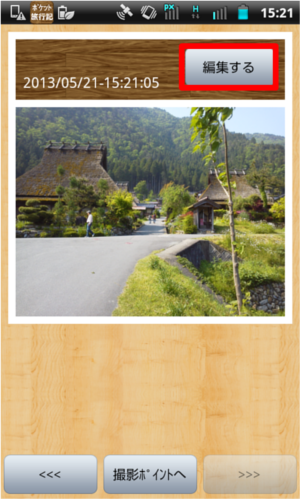
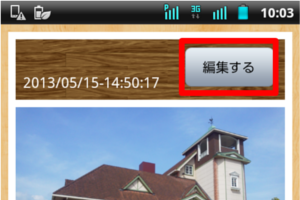
1."Edit (編集する)" Button
If you want to edit photo title or delete photo, touch this button.
2."Photo Location (撮影ポイント)" Button
If you touch this button, Map Screen will be shown and the map center will move to photo location.
3."Previous" Button
Show previous photo
4."Next" Button
Show next photo
Back to the Table of contents
5.Edit My Travel Log
※If you want to edit posted Travel Log, please de-post once.
-
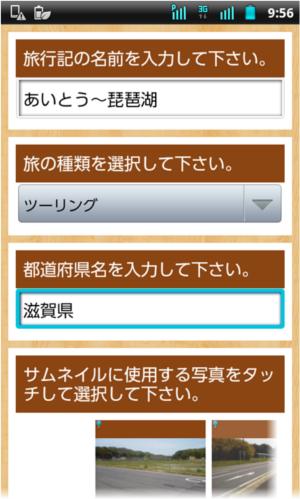
Edit Travel Log Title, thumbnail and etc.
- Touch "Menu (メニュー)" button on the Travel Log that you want to edit.
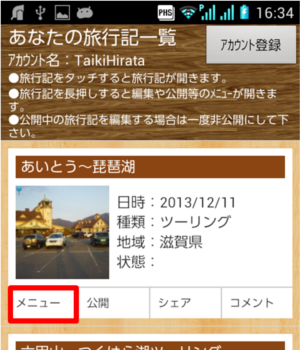
- Select "Edit (編集)" from the menu list.
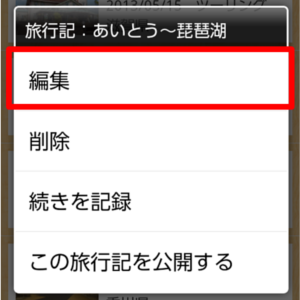
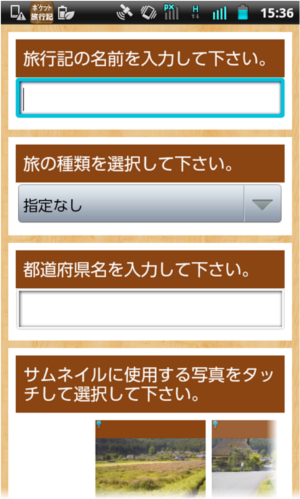
- If you select "Edit (編集)", Edit Screen will be shown. Edit items and touch "Save (保存)" button.
-
Delete Travel Log
- Touch "Menu (メニュー)" button on the Travel Log that you want to delete.

- Select "Delete (削除)" from the menu list.
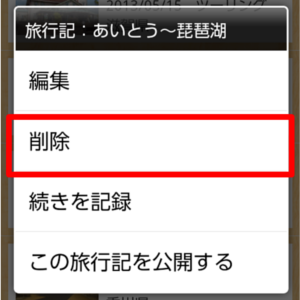
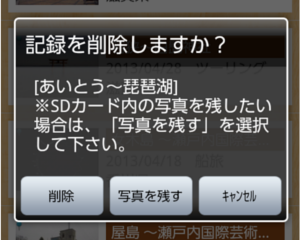
- If you select "Delete (削除)" on the dialog that appears, the Travel Log will be deleted.
-
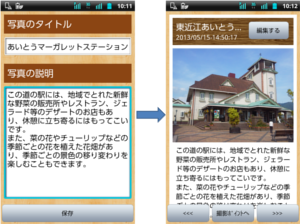
Edit Photo Title and Photo Note
- Touch Travel Log containing the photo that you want to edit.
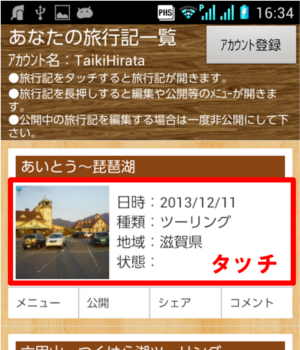
- Touch the pin of photo that you want to edit, and touch the balloon.
- Touch "Edit (編集する)" button in the Photo Screen.
- Select "Edit (編集)" on the dialog.
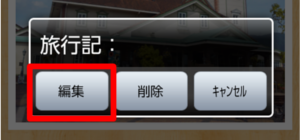
- If you select "Edit (編集)", Edit Screen will be shown. Edit items and touch "Save (保存)" button.
-
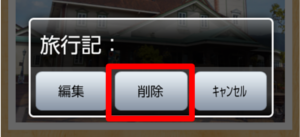
Delete Photo
- Touch Travel Log containing the photo that you want to delete.
- Touch the pin of photo that you want to delete, and touch the button on the balloon.
- Touch "Edit (編集する)" button in the Photo Screen.
- Select "Delete (削除)" on the dialog.
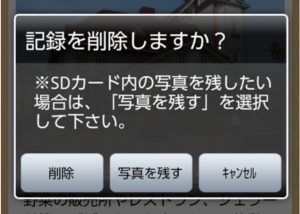
- If you select "Delete (削除)" on the dialog that appears, the photo will be deleted from the Travel Log.
-
Add Photo to Travel Log
This feature allows you add the photo that taken by other camera App or digital camera to the Travel Log. Even if the location information is not attached to the photo, it guess the photo location from the shooting time.
※If you will use digital camera, make sure that the camera's time setting is correct before you shoot.
- Please save the photo that you want to add to "SDcard or Device".
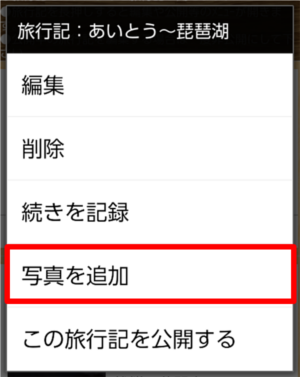
- Touch "Menu (メニュー)" button on the Travel Log that you want to add the photo.

- Select "Add Photo (写真を追加)" from the menu list.
- Touch "Select Photo (写真を選択)" button in the Add Photo Screen.
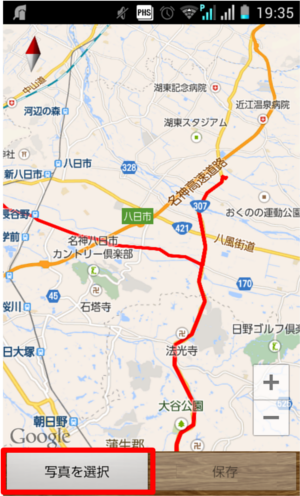
- Select photo that you want to add.
-
Based on the information that is attached to the photo, blue pin will be drawn on the map in the pattern of the following three.
- ・If the photo has location information, the marker will be drawn with the location information that is attached to the photo.
- ・If the photo has shooting information, the marker will be drawn with the date information that is attached to the photo.
- ・If the photo had no information, the marker will be drawn at map center.
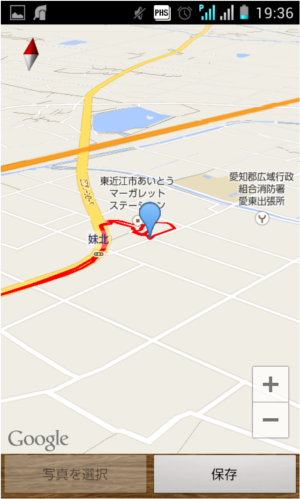
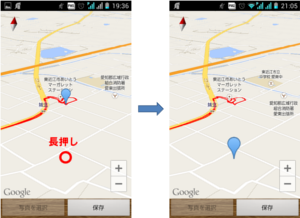
- You can change the position of the marker by long press on the map.
- If you want to save the marker position, press "Save (保存)" button.
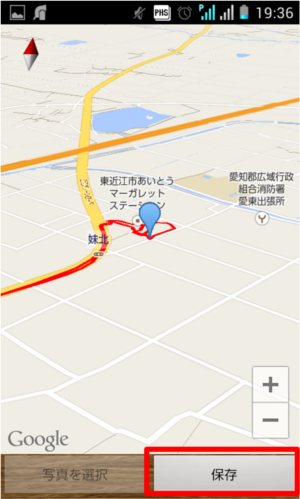
- If you touch "Save (保存)", the dialog will be shown. Operate according to the instructions on dialog.
- If you succeed to save the photo, the pin that you add will become red.
If you want to continue adding photo, please repeat step 10 from step 4.
If you want to finish adding photo, touch "Back" button on your device.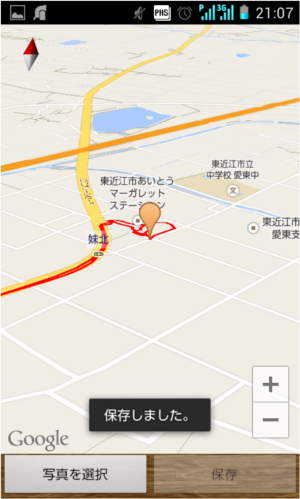
Remarks
- If you want to edit added photo title and note, refer "Edit Photo Title and Photo Note".
- Photos that you add will be copied to the folder within the following.
"SDcard or Device" / PokeTra / "ID number"
Back to the Table of contents
6.Post My Travel Log
If you post your Travel Log, you will be able to do following.
- ・Share your Travel Log with other users.
- ・Share your Travel Log with your friends through the SNS
- ・Post comment to your Travel Log
-
Before post Travel Log
Read "Travel Log post service 旅行記掲示板 Agreement" before you post your Travel Log.
-
Register Account
If you want to post your Travel Log, you need to get an account and register an account.
New Account
If you do not have an account yet, you can get the following procedure.
- Touch "Account (アカウント登録)" button in the My Travel Log List Screen.
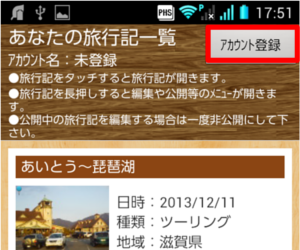
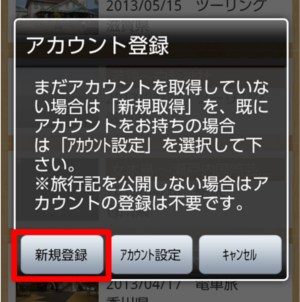
- Select "New Account (新規登録)" on the Dialog.
- Enter account name and password and press "Accept the agreement and registered (利用のルールに同意して登録)" button after reading "Agreement (利用のルール)".
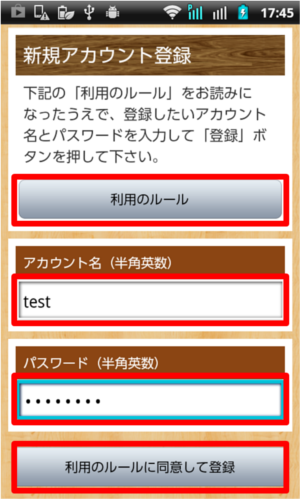
- If you succeeded to register, the Account name will be shown in My Travel Log Screen.
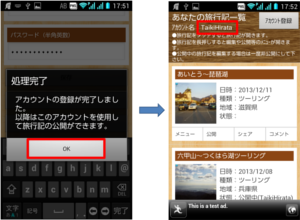
- If the registration error occurs, please re-register according to the contents of the error.
If you have an account already, you can get the following procedure.
- Touch "Account (アカウント登録)" button in the My Travel Log List Screen.
- Select "Setting Acount (アカウント設定)" on the Dialog.
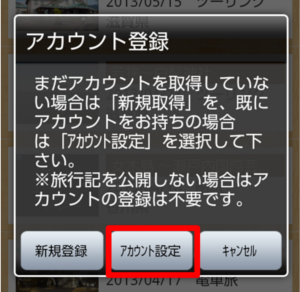
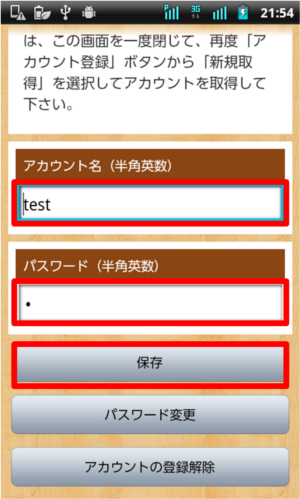
- Enter account name and password and press "Save (保存)" button.
-
Post Travel Log
If you want to post your Travel Log, do the following after registering an account.
- Touch "Post (公開)" button on the Travel Log that you want to post.
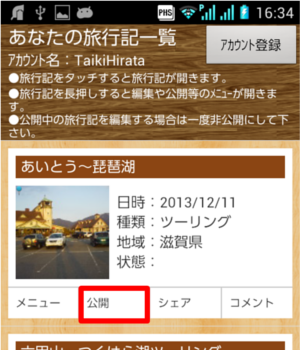
- Choose whether or not to remove part of your travel route.
- Select the photos you want to post, and press "Post Travel Log (旅行記を公開する)" button.
- When posting process is started, start message will be shown on status bar. Posting process may take several minutes.
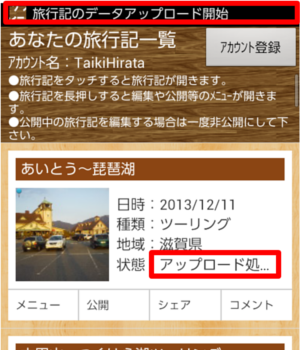
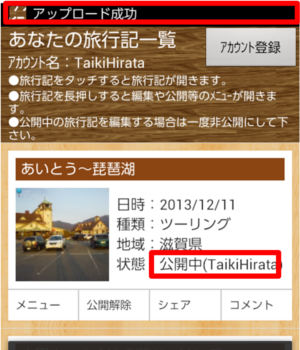
- If you succeeded to post, success message will be shown on status bar and "Posted" label will be shown on the Travel Log.
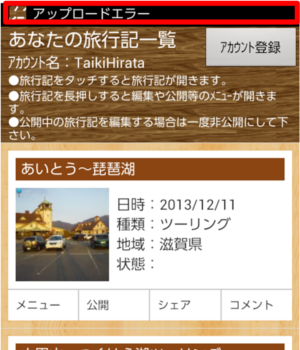
- If you failed to post, error message will be shown on status bar. The main cause of failure to post, it may be "sufficient free space is not in the terminal" or "congestion and server communication line".
-
Show Posted Comment
If you want to show comment, touch "Comment (コメント)" button on the Travel Log.
*Account is required to post a comment.
-
Edit Posted Travel Log
If you want to edit posted Travel Log, please de-post once.
-
de-Post Travel Log
If you want to de-post Travel Log, do the following procedure. *You need same account name that you used to post.
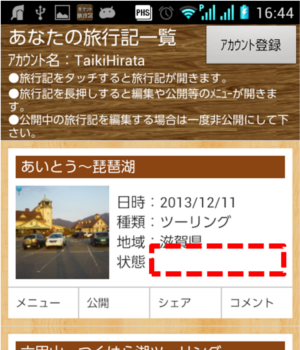
- Touch "de-Post (公開解除)" button on the Travel Log that you want to de-post.
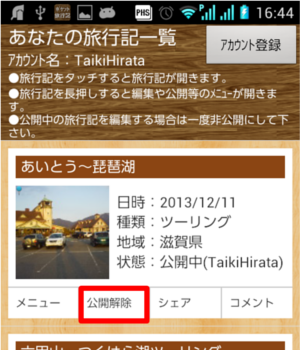
- Select "OK" on the dialog.
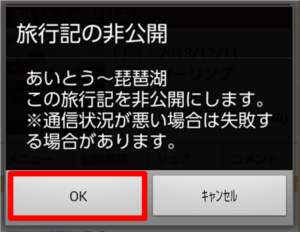
- If you succeeded to de-post, success message will be shown and "Posted" label will be removed from the Travel Log.
-
Edit Account, Delete Account
You can change password of your account and delete your account.
Change Password
- Touch "Account (アカウント登録)" button in the My Travel Log List Screen.
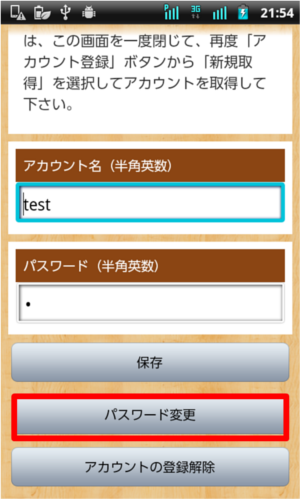
- Select "Setting Acount (アカウント設定)" on the Dialog.

- Touch "Change Password (パスワード変更)" button.
- Enter current password and new password and touch"Change (変更)" button.
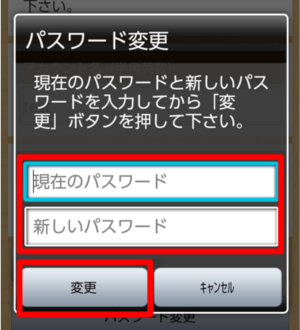
- If you succeed to change password, Success dialog will be shown.
- If error dialog was shown, please try again according to the contents of the error.
Delete Account
*If you delete the account, all Travel Log and comments that were posted using this account will be de-post.
- Touch "Account (アカウント登録)" button in the My Travel Log List Screen.
- Select "Setting Acount (アカウント設定)" on the Dialog.

- Touch "Delete Account (アカウントの登録解除)" button.
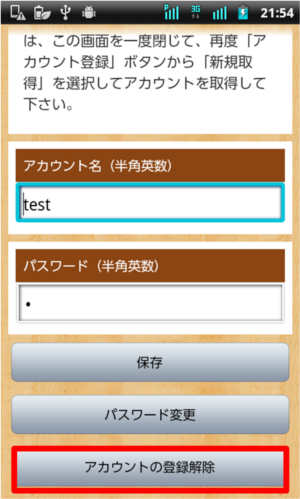
- Enter current password and touch "OK" button.
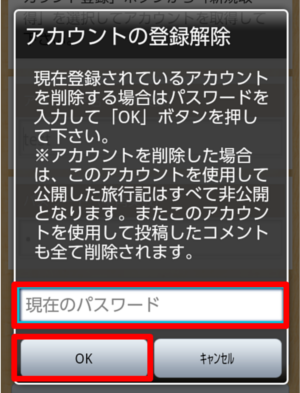
- If you succeed to delete account, Success dialog will be shown.
- If error dialog was shown, please try again according to the contents of the error.
Back to the Table of contents
7.Share My Travel Log
You can share your Travel Log with your friends through the SNS, such as facebook and twitter. Even if your friends do not use "PockeTraveL", You can share your Travel Log through the web browser.
- First of all, post your Travel Log.6.Post My Travel Log
- Touch "Share(シェア)" button on the Travel Log that you want to share with your friends.
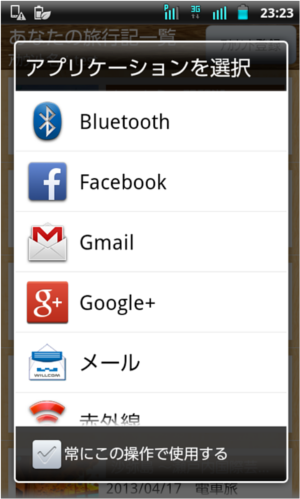
- Select the App that you want to use to share with your friend.
Back to the Table of contents
9.Show My posted Travel Log on Google Maps
You can show your Travel Log on Google My Map, by creating KML file and importing it.
First of all, post your Travel Log.6.Post My Travel Log
-
Create KML file
Touch "Menu" button on the Travel Log that you want to create KML file.
-
Select type of KML file
Select "KML file output (Full)" or "KML file output (Trimmed)" from menu list.
Full
This KML file has all route information. If its route information is too large, map will be divided into a plurality of sheets when you import to Google My Maps.
Trimmed
This KML has route information thinned out in 30-second intervals. Accuracy of the route information will be less, but the map is making it easier to fit into a single sheet when you import to Google My Maps.
-
Enter file name
Enter file name and touch "OK" button, creating KML file will be started. *only alphanumeric
-
Succeed creation
If you succeed to create file, Success dialog will be shown. If error dialog was shown, please try again according to the contents of the error.
The file is saved in the following folder. "SDcard or Device" / PokeTra / kml
-
Import method to Google My Maps
Refer to the following information.
GoogleMap Help
Back to the Table of contents
10.Show Travel Log of others
Show Travel Log of others list from "Travel Log of others" button in Top Screen. Basic operation of each screen is the same as "My Travel Log".
-
Search Travel Log
You want to search Travel Log, touch "Menu" button in Travel Log of others Screen, and select "Search Travel Log".
-
Bookmark Travel Log
- If you want to bookmark Travel Log, touch "Bookmark" button on the Travel Log that you want to bookmark in Travel Log of others Screen.
- If you want to show bookmarked Travel Log list, touch "Menu" button in Travel Log of others Screen, and select "Show Bookmarks".
- If you want to cancel bookmark, touch "Cancel Bookmark" button on the Travel Log in bookmarked Travel Log Screen.
-
Comment
If you want to show comment or send comment to the Travel Log, touch "Comment" button on the Travel Log.
*Account is required to post a comment.
-
Navigation to Photo Location
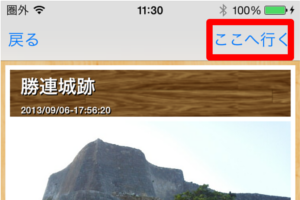
If you want to start navigation to photo location, touch "Navi (ここへ行く)" button in Photo Screen of others Travel Log.
*If the map application is not installed on your device, you can not use this feature.
Back to the Table of contents
11.Backup/restore
You can create the backup file from your Trave Log, and you can restore your Travel Log from the backup file.
Please use it when you want to move your LogBooks to another Device.
*Refer to the steps below for account migration.If you have an account already
*You can not transfer the data in "android device" between "iOS device".
How to create Backup file
- If you want to create backup file from your current Travel Log, Select "Backup/Restore" from Top Screen "Manual/Menu" button.
- When you touch "Create Backup File" button, the backup file creation will be started.
*The backup file will be stored to "PokeTra" folder that is in "SD card or Device"
Location of PokeTra Folder
How to Restore
1. In case Android 4.4 or later + SD card
- Install "PockeTraveL" to your new device.
- Please make "SD card/Android/data/t.hirata.tabilog/files/Download/PokeTra" folder, by launching "PockeTraveL".
- Please overwrite the "PokeTra" folder by "PokeTra" folder that contains backup file and photos.
- Launch "PockeTraveL" and select "Backup/Restore" from Top Screen "Manual/Menu" button.
- When you press "Restore Travel Logs" button, your Travel Log will be restored in your new device from backup file.
2. Others
- if your new device has SD card, move "PokeTra" folder that contains backup file and photos to its SD card. *If you will use same SD card that have been used in the your old device to your new device, please insert the SD card to your new device.
if your new device does not have SD card, move "PokeTra" folder that contains backup file and photos to the device.
- Install "PockeTraveL" to your new device.
- Select "Backup/Restore" from Top Screen "Manual/Menu" button.
- When you press "Restore Travel Logs" button, your Travel Log will be restored in your new device from backup file.
*if "Backup file is not found" message was shown in case you moved "PokeTra" folder to SD card, please try again after moving the folder to device.
Back to the Table of contents
12.About Store Pictures
If your device has SD card slot, photos taken by "PockeTraveL" is saved in SDcard. If your device does not has SD card slot, photos taken by "PockeTraveL" is saved in Device.
Folder Name
"SD card or Device" / PokeTra / "ID number"
In case Android 4.4 or later + SD card
SD card/Android/data/t.hirata.tabilog/files/Download/PokeTra/"ID number"
Back to the Table of contents
13.Other Apps
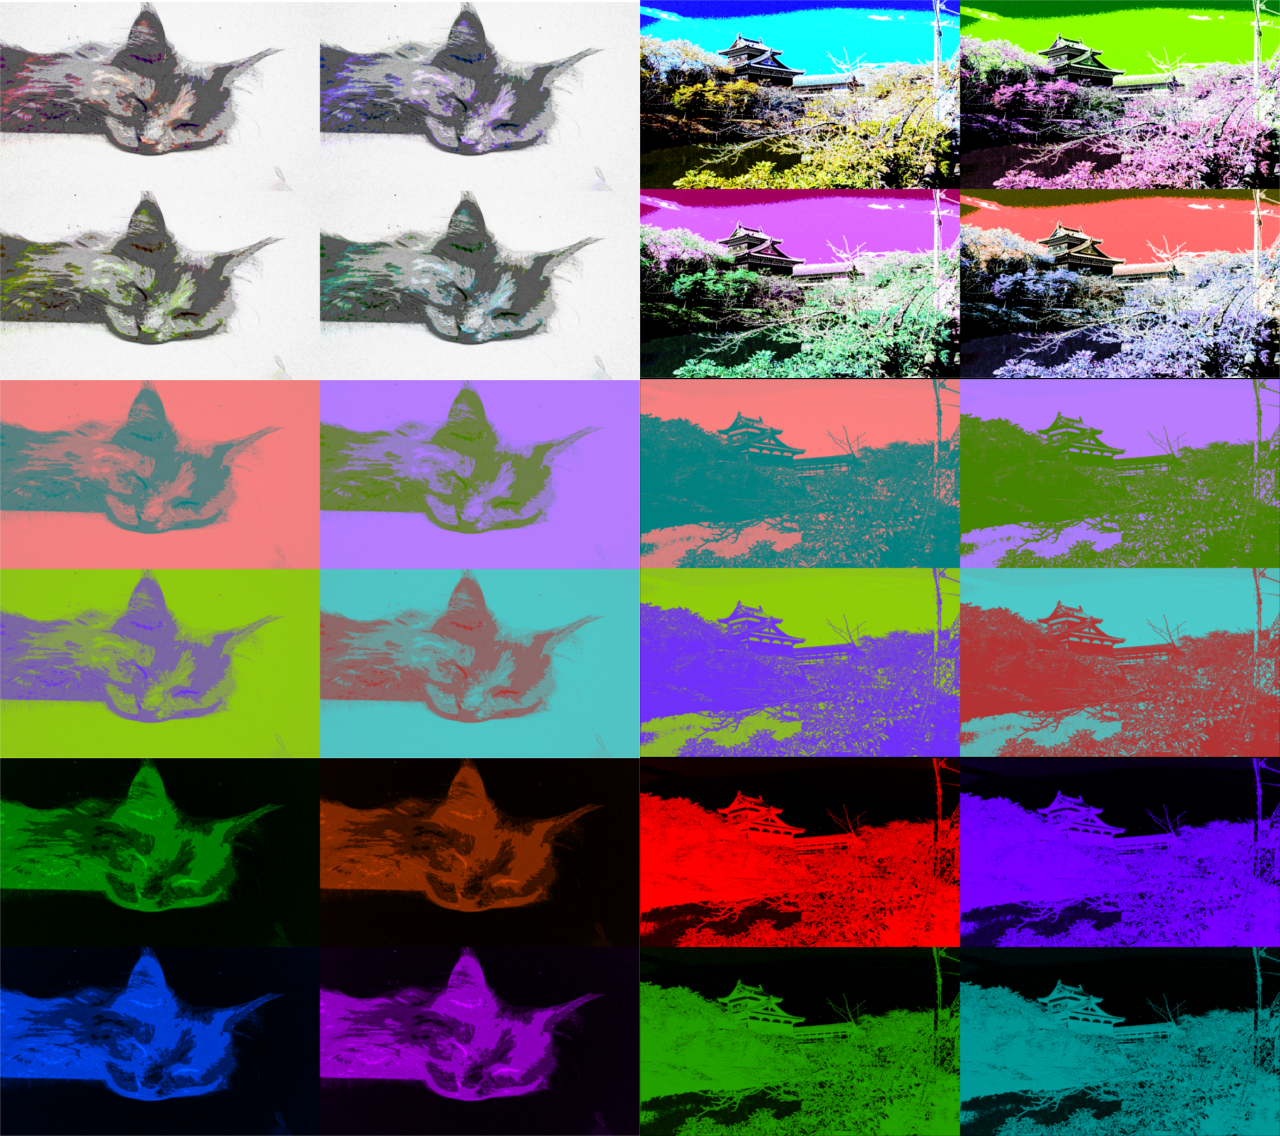
Art Serigraphy - Contemporary / Modern Art Style Filter App -

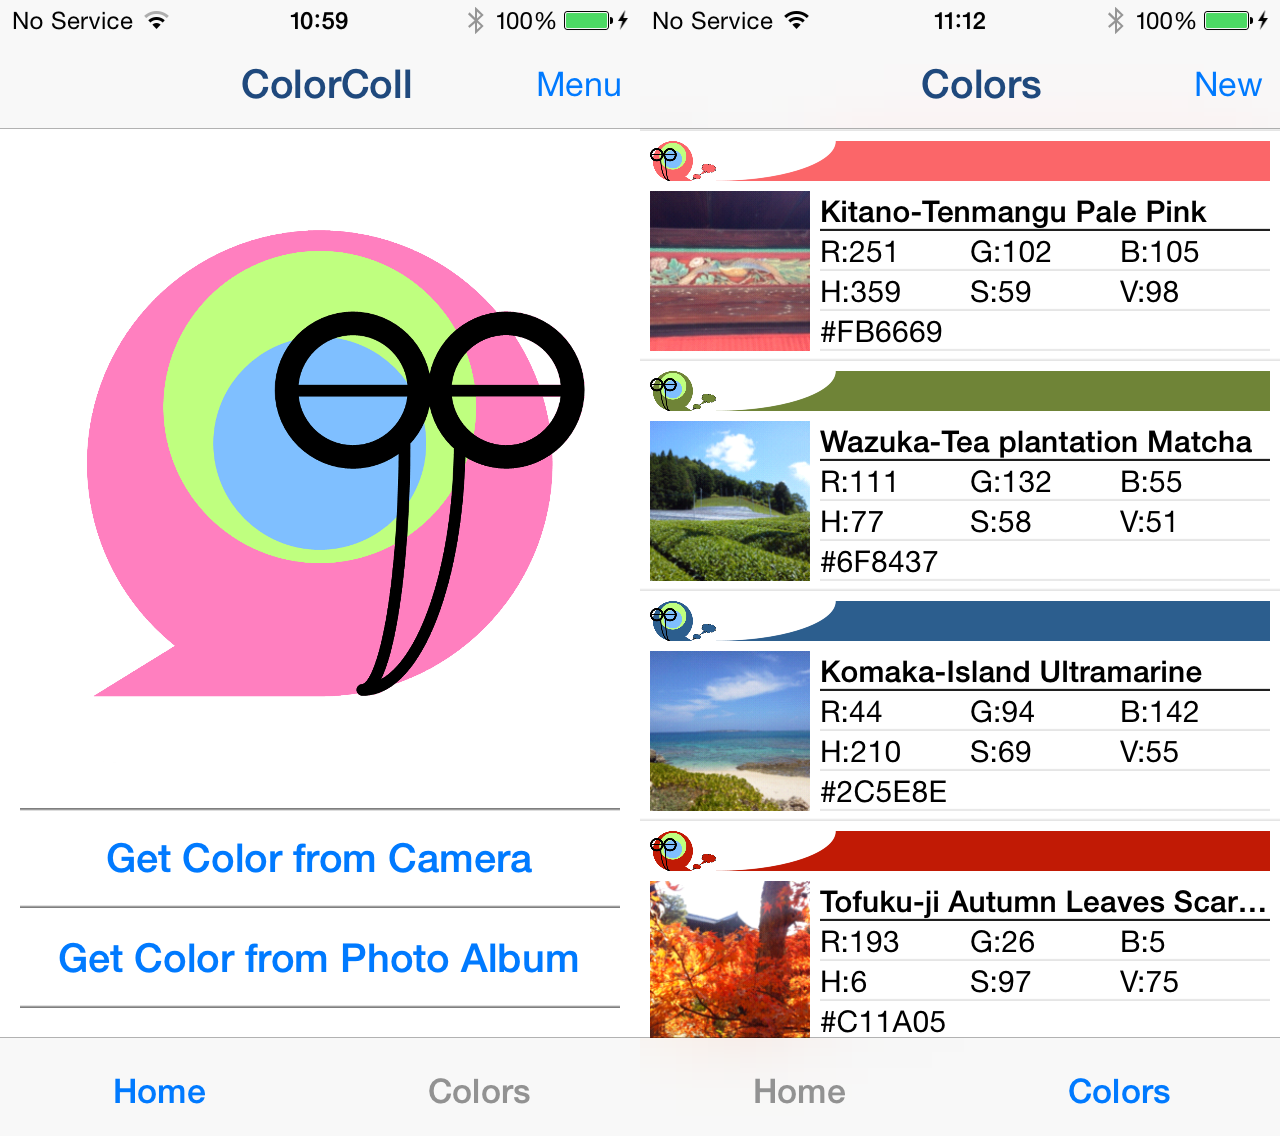
ColorColl - Color Picker/Capture App for Collect World Color -

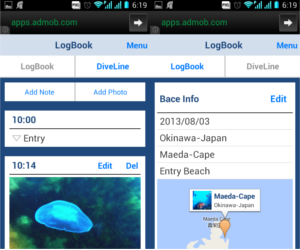
DivingLog - Scuba Diving LogBook App -

Market Share Simulator -Simulation of Market Share by Brand Loyalty-


Population Simulator - The Population Model with Logistic Map -

