1.Screen Description
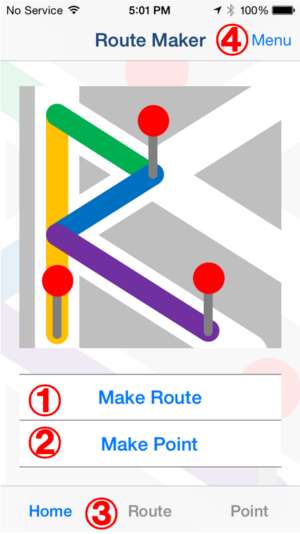
Home Screen
-
Make Route Button
Make route.
-
Make Point Button
Make point.
-
Tab button
Switch Home Screen, Route List Screen and Point List Screen.
-
Menu Button
Display following contents.
- Manual
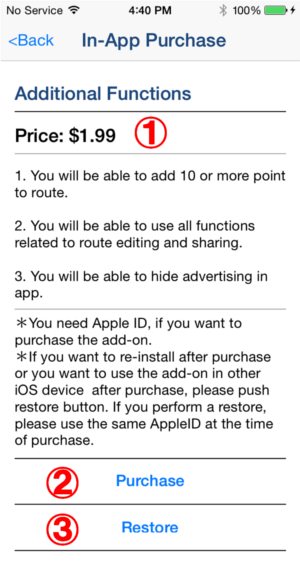
- In-App Purchase
- Other Apps
- Copyright Info
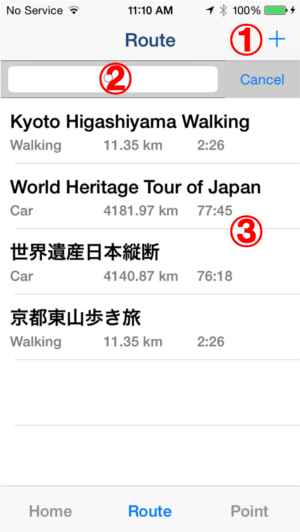
Route List Screen
-
Make Route Button
Make Route
-
Search Bar
Search for created route.
Cancel search results by "Cancel" button.
-
Route List
Show route screen by touch.
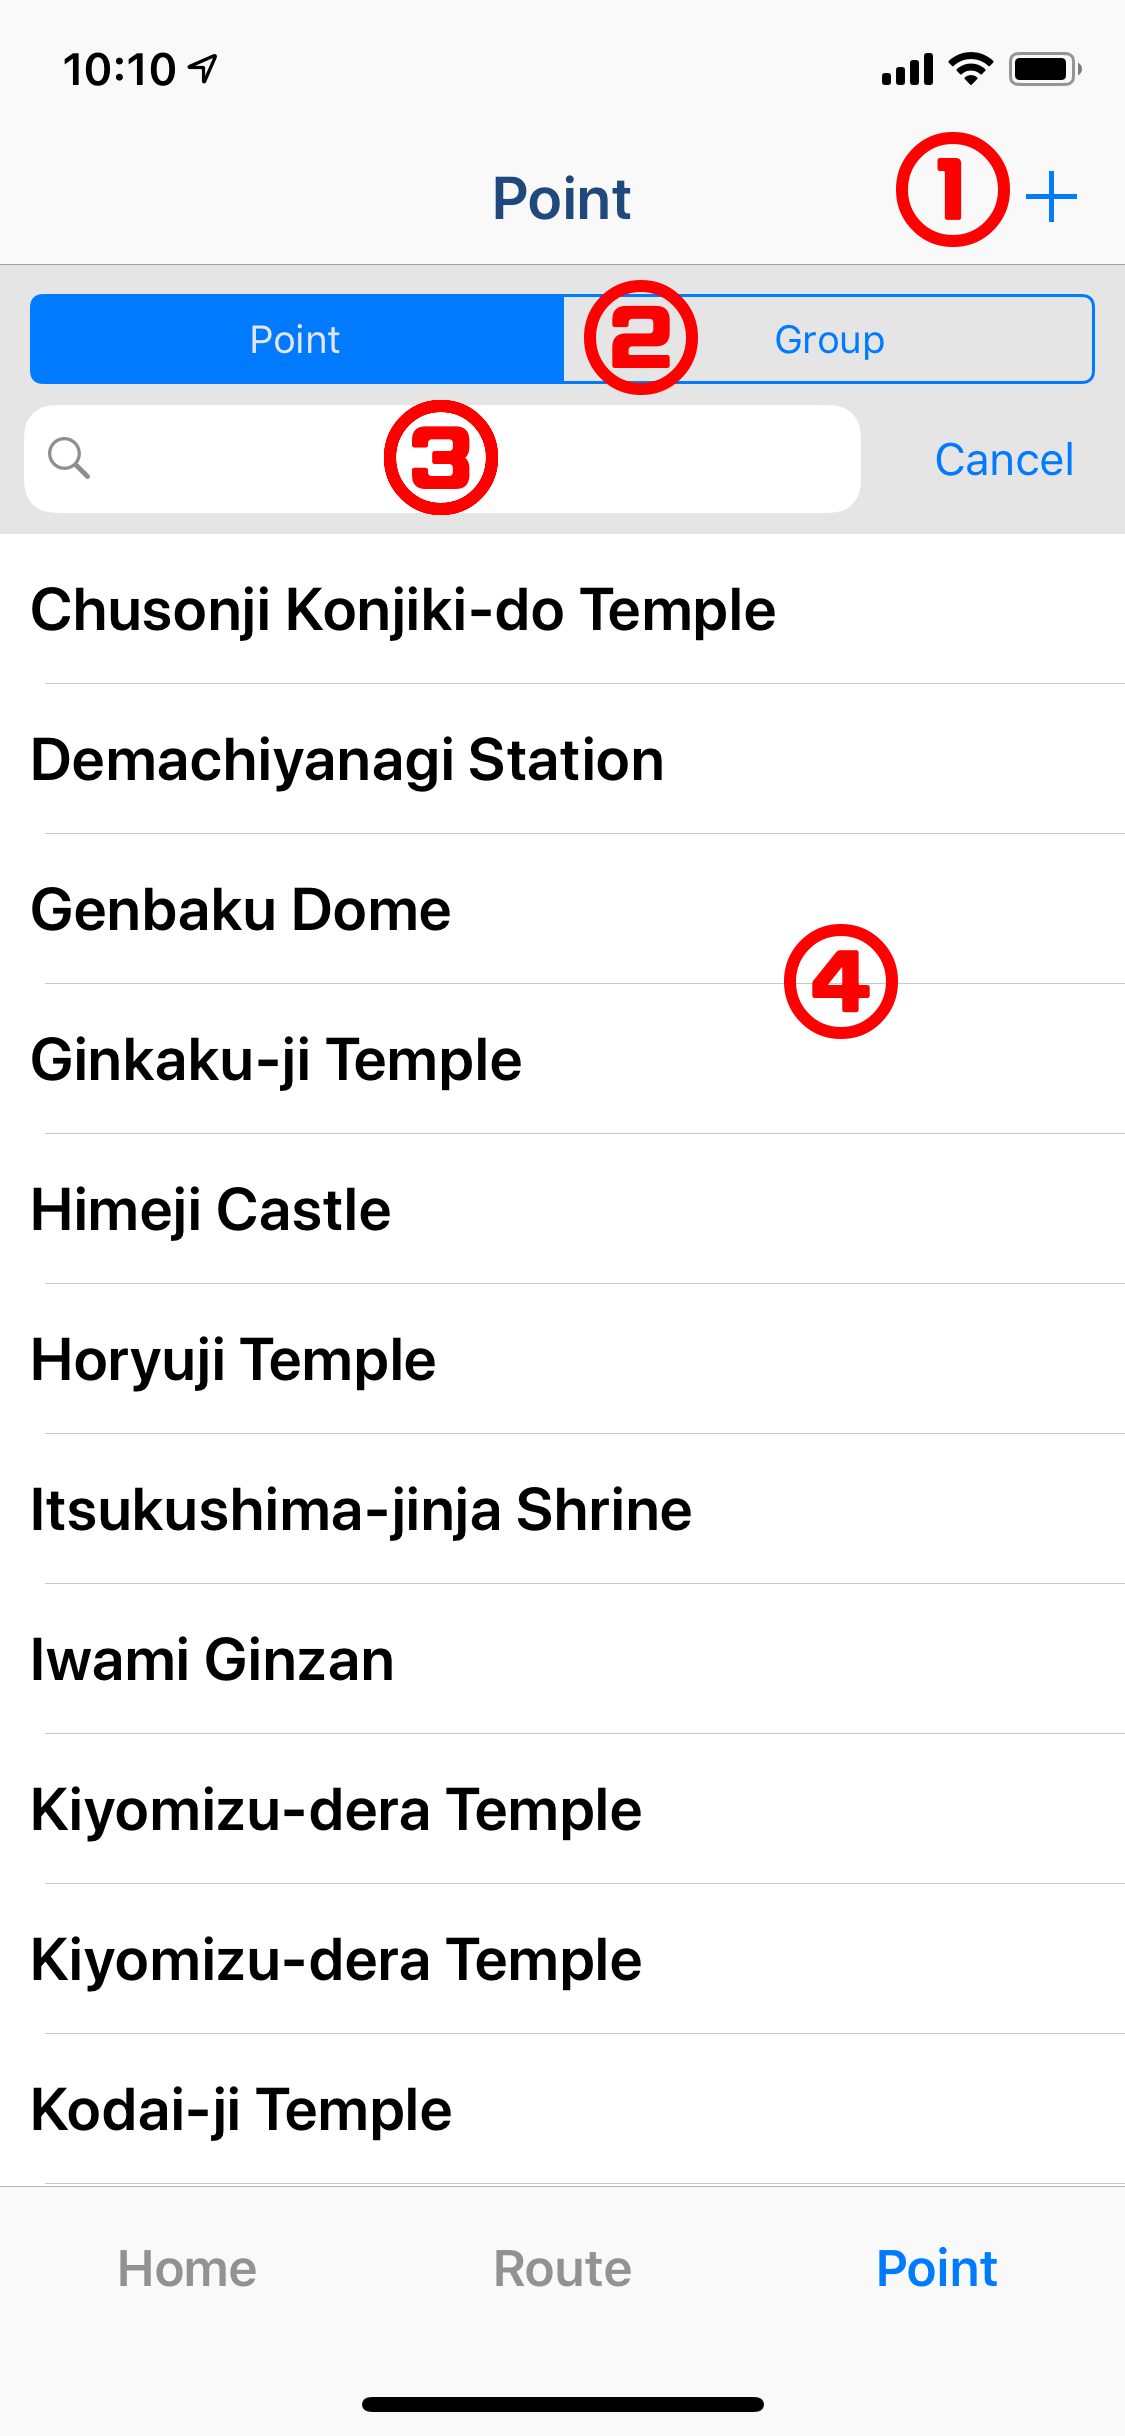
Point List Screen (Point) ver2.0〜
-
Make Point/Group Button
Make Point or Group.
-
Point/Group Switch.
Switch between Point screen and Group screen.
-
Search Bar
Search for created point.
Cancel search results by "Cancel" button.
-
Point List
Show point screen by touch.
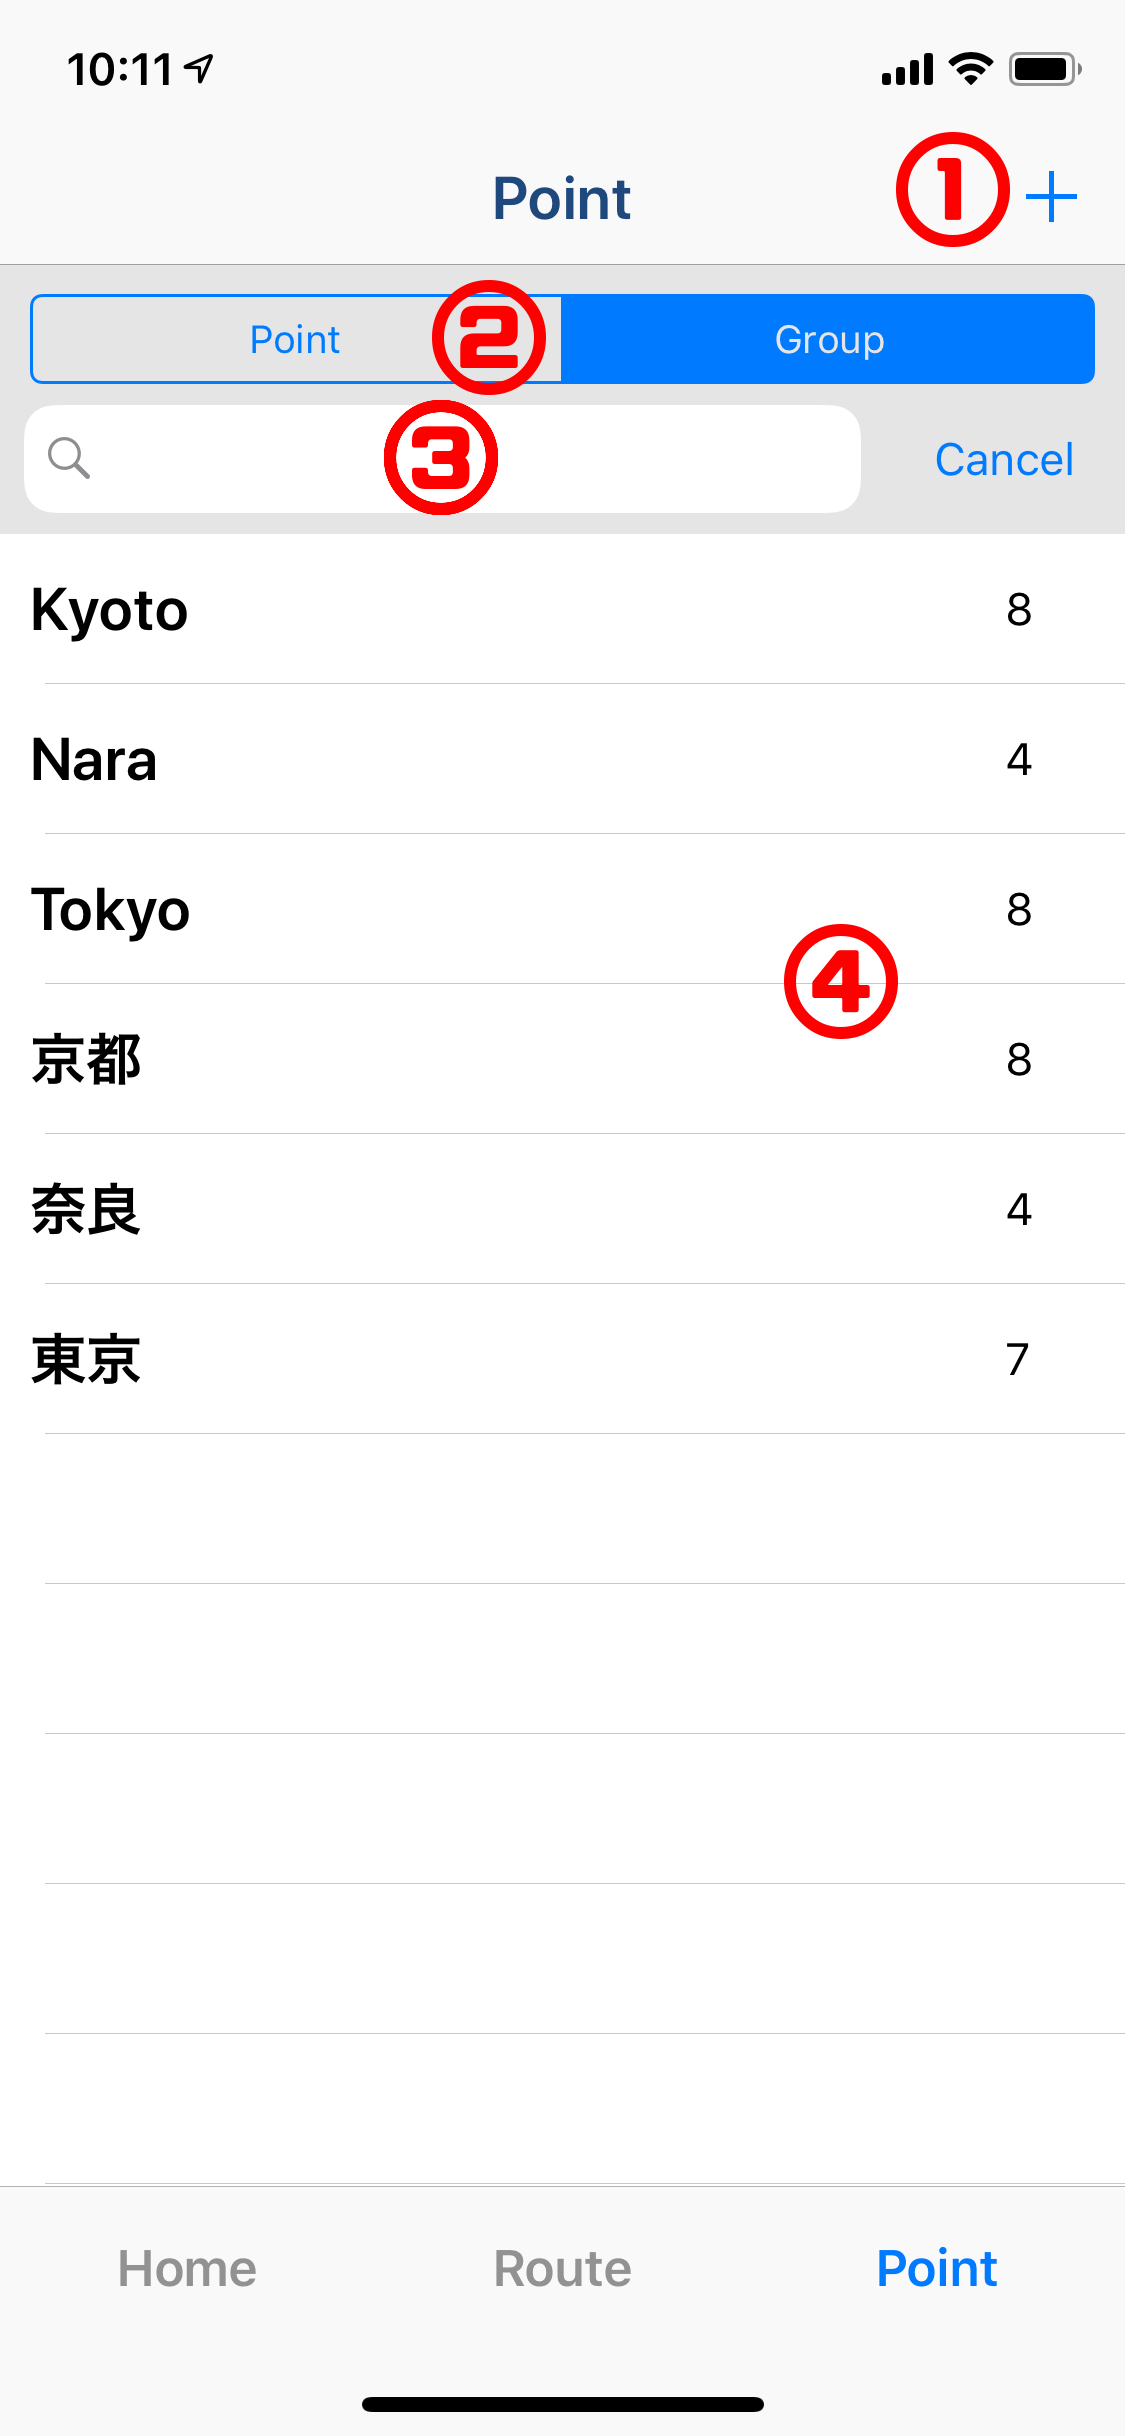
Point List Screen (Group) ver2.0〜
-
Make Point/Group Button
Make Point or Group.
-
Point/Group Switch.
Switch between Point screen and Group screen.
-
Search Bar
Search for created group.
Cancel search results by "Cancel" button.
-
Group List
Show group screen by touch.
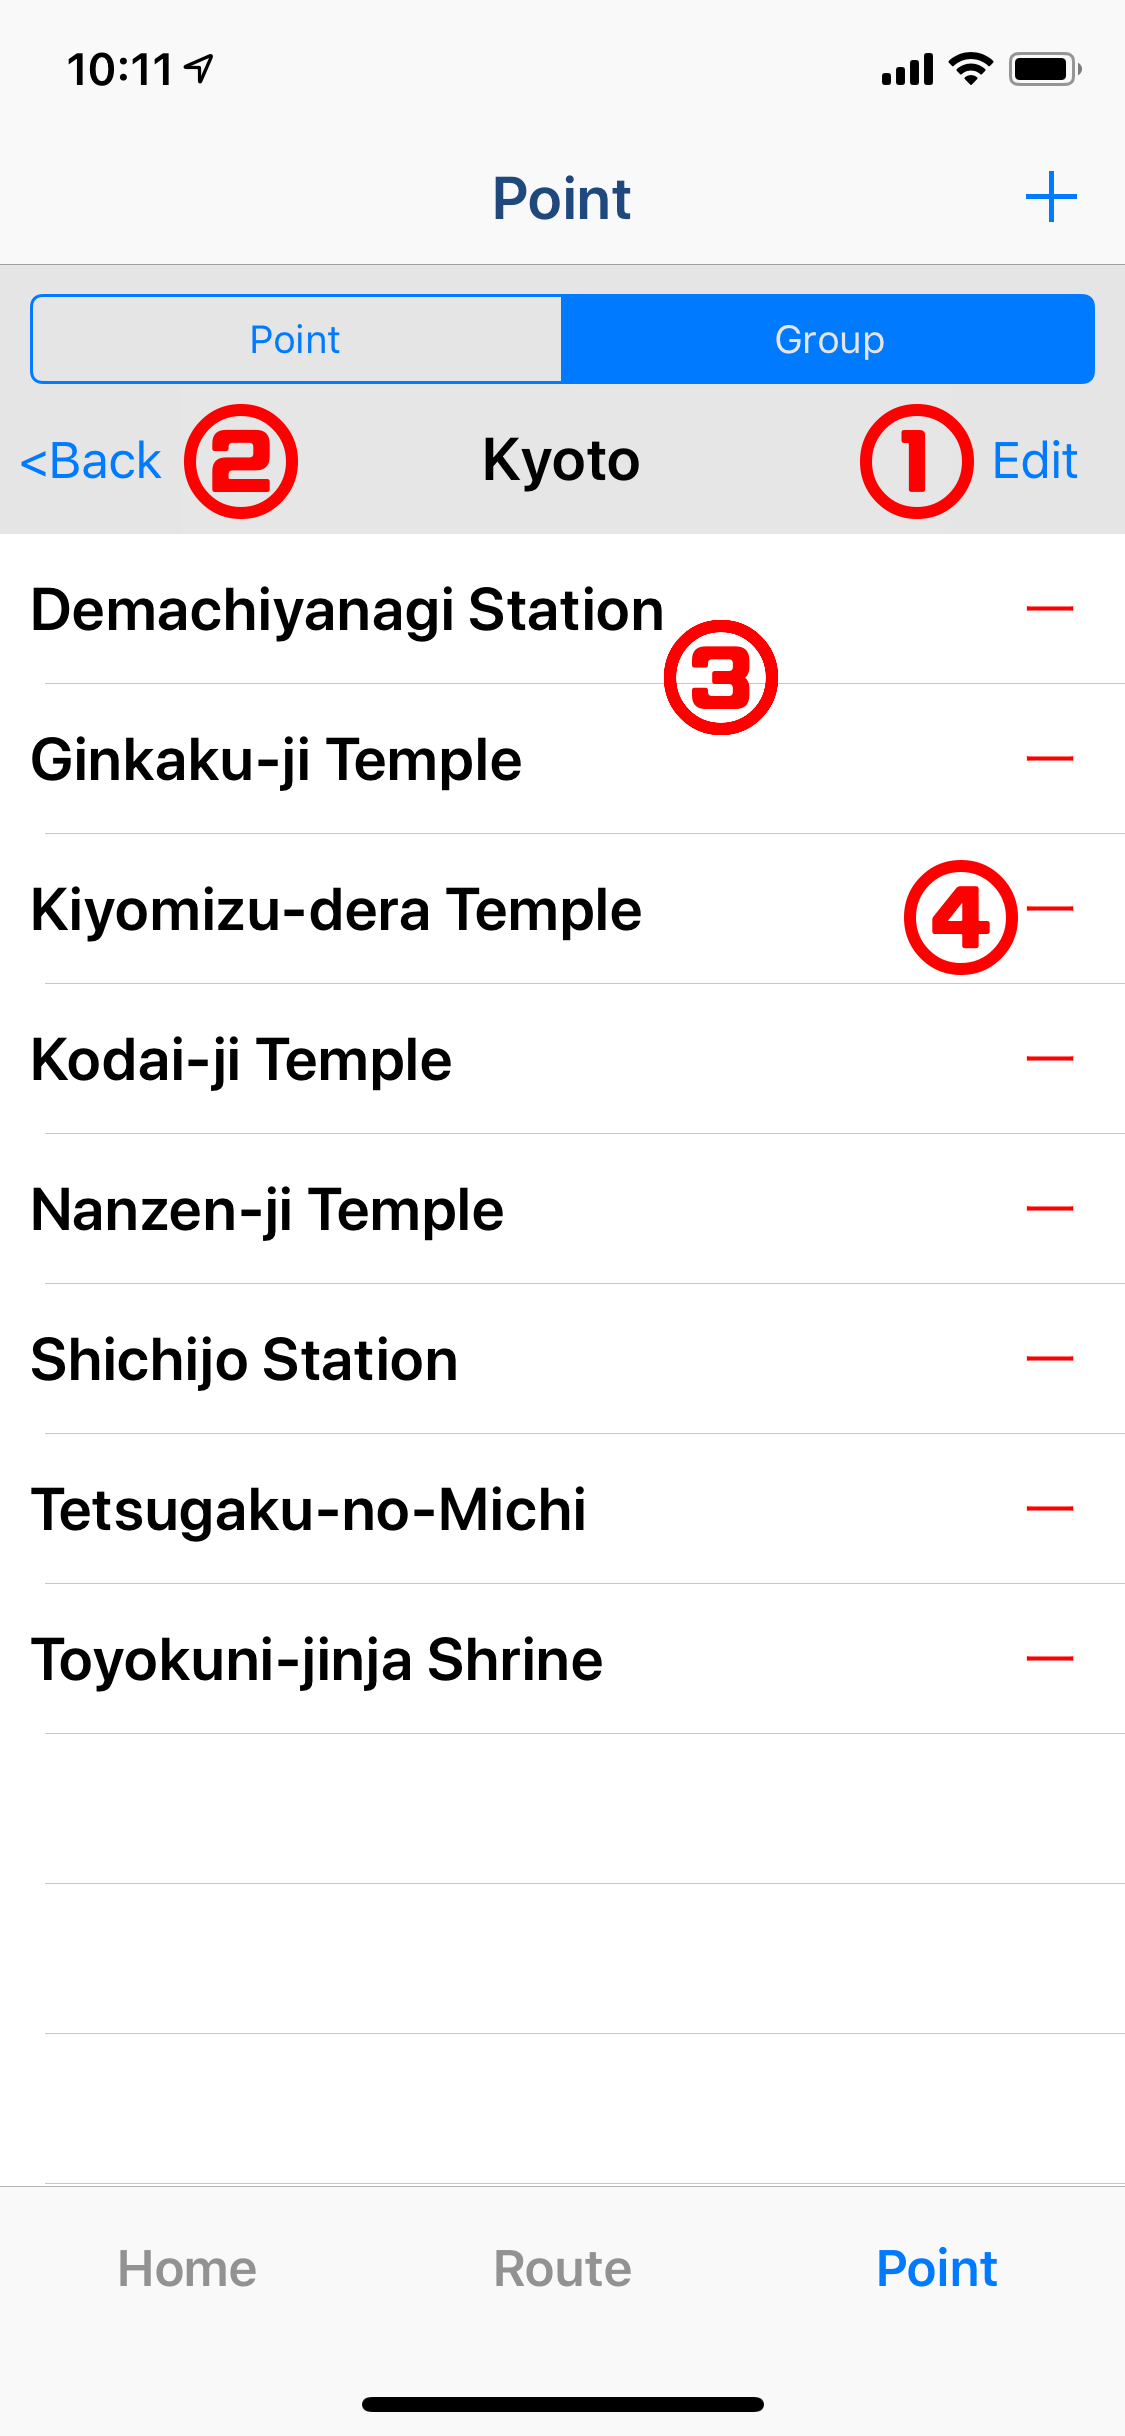
Group Screen ver 2.0〜
-
Edit Button
Delete the group, Edit the group name, Add point to the group.
-
Back Button
Back to before screen.
-
List of Points included in the Group.
Show point screen by touch.
-
Remove Button
Remove the point from the group by tapping "ー" button on each point.
Select Point Screen (Group) ver 2.0〜
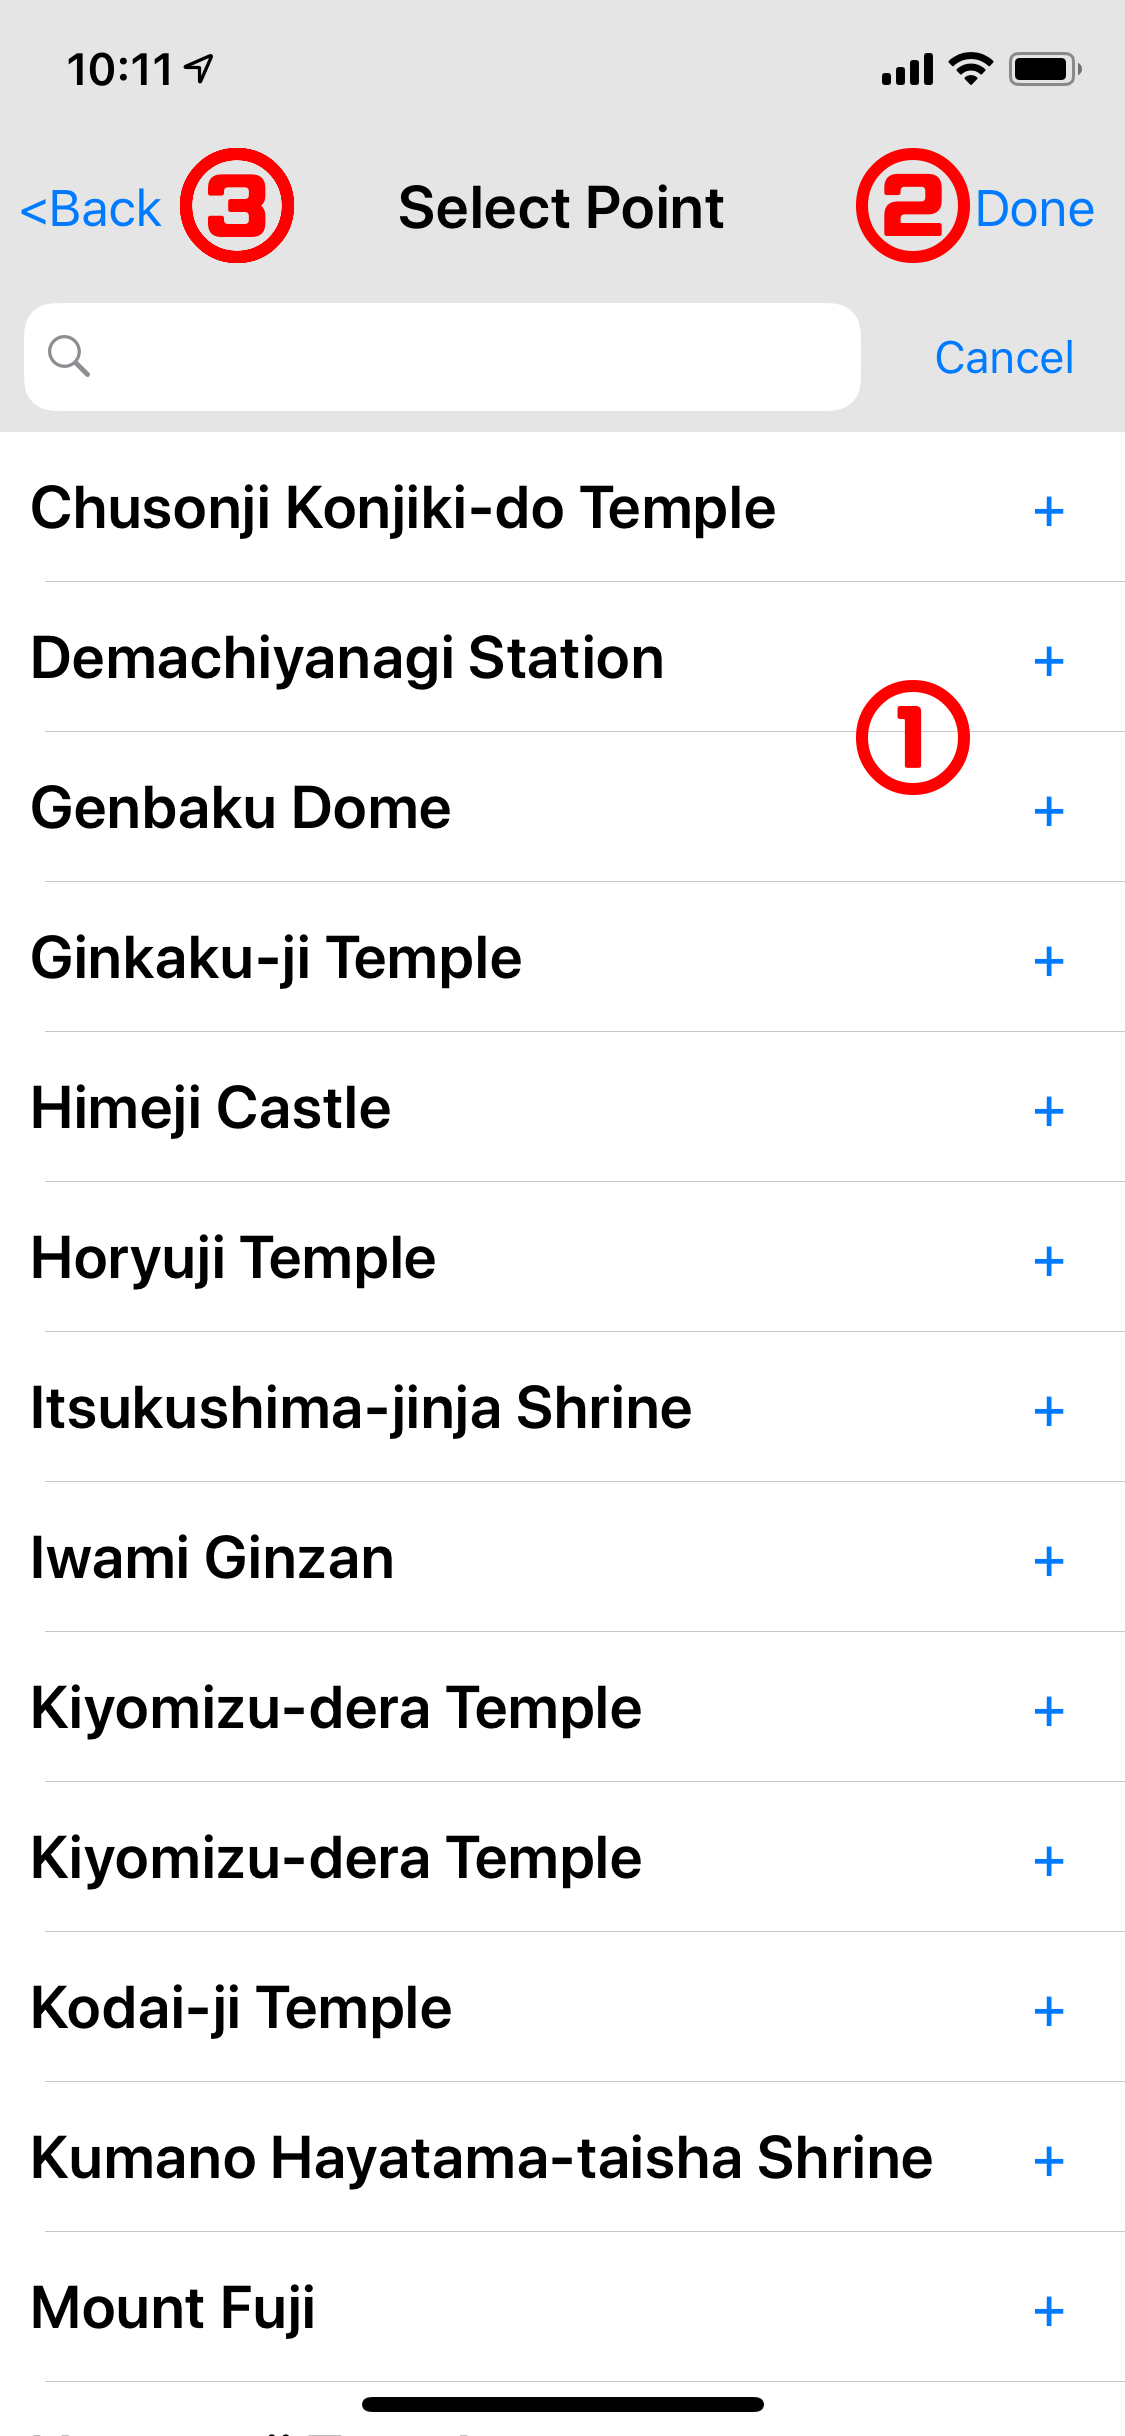
-
Point List
Tap to select the point you want to add to the group.
-
Done Button
Add the selected point to the group.
-
Back Button
Back to before screen.
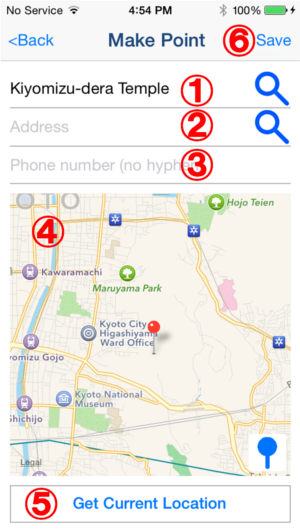
Make Point Screen
Point
Point is treated as the destination or waypoint.
You can add the information(Name, TEL, etc...) to the Point.
After making the Point, you can use it in any routes.
-
Name Entry Field and Search button by name
Entry field of point name.
You can search for location information from facility name by Search button on right, after entering the point name.
-
Address Entry Field and Search button by address
Entry field of point address.
You can search for location information from address by search button on right, after entering the point address.
-
Phone Number Entry Field
Entry field of phone number.
-
Map
You can set location info by the following way.
Touch "Search" button after entering "Point name" or "Address".
Touch "Get Current Location" button.
Long touch on the map.
You can display registered point on map by bottom right button.
-
Get Current Location Button
Set current location as the location information of the point.
-
Save Button
Save point.
Point Screen
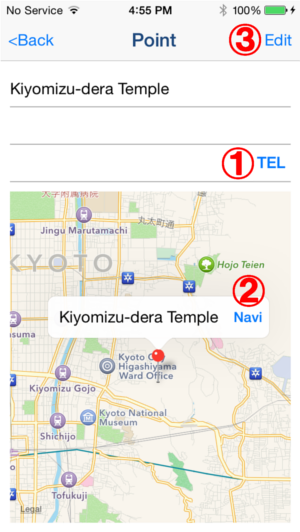
-
TEL Button
If the point has phone number, you can call by this button.(You need device with call function.)
-
Navi Button
You can start navigation by using map app that is installed on your device.
-
Edit Button
You can do following operation.
Delete point.
Edit point name, address and phone number.
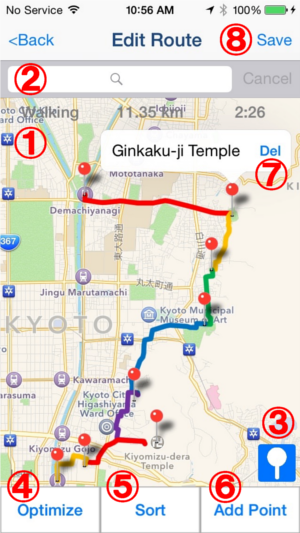
Make Route Screen
You can add the Point or the Pass Point and make route by the following way.
Point
Point is treated as the destination or waypoint.
You can add the information(Name, TEL, etc...) to the Point.
After making the Point, you can use it in other routes.
How to add the Point
Touch "Add Point" button and select point.
Touch registered point that displayed when you touch "Icon" button.
Touch the point of search result that displayed when you searched by name with search bar.(ver1.5〜)
Long tap on the map.
Pass point (ver1.5〜)
Pass point is treated as the mere pass point.
If you want to edit the route to the destination or waypoint without registering the Point, please use the Pass point.
You can not add any information to the Pass point.
You can not use the Pass point in other routes.
How to add the Pass point
Long tap on the map.
-
Map
Route, means of transportation, distance and time required are displayed on map.
*The time required for each route are approximate.
It does not guarantee the reliability of the required time.You can add point you touch to route by long touch on map.
-
Name Search Bar (ver1.5〜)
You can search the Point by name.
Search results contain the search service result and the registered point in app.
You can add the Point to route by touching the search result point.
-
Icon Button
You can display registered point on map by this button.
You can add the Point to route by touching registered point.
-
Optimize Button
Optimize route by sorting point to close from the start point.
- It may take a long time to process, if the route has many points.
- Optimized route might not be the shortest.
- When you continuously run many times, route search server may become temporarily unavailable.
-
Sort Button
Sort point freely.
-
Add Point Button
You can add point to route by selecting from point list.
You can add unregistered point by "Make Point" button in point list.
-
Delete Button
Delete point from route.
-
Save Button
Name and save route.
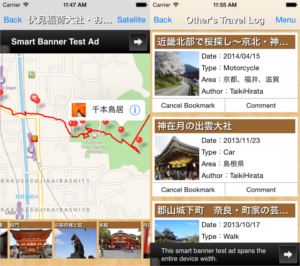
Route Screen
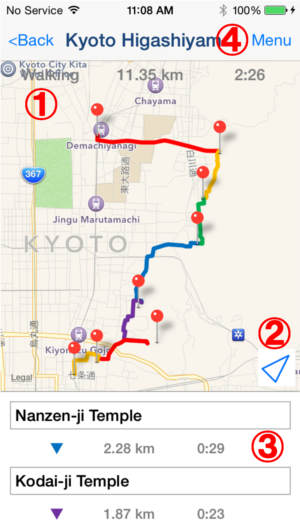
-
Map
Route, means of transportation, distance and time required are displayed on map.
*The time required for each route are approximate.
It does not guarantee the reliability of the required time.You can browse point detail by touching point icon.
-
Current Location Button
Display your current location on map.
-
Point List
List of points included in the route.
You can scroll map to the point by touching list item.Approximate time required and the distance to the next point is displayed at between each points.
*The time required for each route are approximate.
It does not guarantee the reliability of the required time. -
Menu Button
Display following contents.
- Delete Route.
- Edit Route Name
- Edit Route *need Add-on.
- Copy Route *need Add-on
- Output KML File *need Add-on
- Send to another iOS Device *need Add-on